第14节 go 调试 测试 以及调试工具 dlv
❤️💕💕记录sealos开源项目的学习过程。k8s,docker和云原生的学习。Myblog:http://nsddd.top
[TOC]
调试Go工程
提示
prepare:
- vscode
- golang 1.92
demo
go mod init test
In main.go file
package main

import (
	"fmt"
)

// Swap functions
func swap(x, y *string) (string, string) {
	//XOR exchange
	*x, *y = *y, *x
}

func main() {
	fmt.Println("Hello, world!")
	//Swap functions
	for i := 0; i < 10; i++ {
		a := "a"
		b := "b"
		swap(&a, &b)
		fmt.Println(a, b)
	}
}
vscode一键生成测试
>gotest for package/function
提示
分别是为包生成测试单元,为函数生成测试单元。
生成如下:
package main

import (
	"testing"
)

func Test_main(t *testing.T) {
	tests := []struct {
		name string
	}{
		// TODO: Add test cases.
	}
	for _, tt := range tests {
		t.Run(tt.name, func(t *testing.T) {
			main()
		})
	}
}

func Test_swap(t *testing.T) {
	type args struct {
		x *string
		y *string
	}
	tests := []struct {
		name  string
		args  args
		want  string
		want1 string
	}{
		// TODO: Add test cases.
	}
	for _, tt := range tests {
		t.Run(tt.name, func(t *testing.T) {
			got, got1 := swap(tt.args.x, tt.args.y)
			if got != tt.want {
				t.Errorf("swap() got = %v, want %v", got, tt.want)
			}
			if got1 != tt.want1 {
				t.Errorf("swap() got1 = %v, want %v", got1, tt.want1)
			}
		})
	}
}
我们在 TODO: Add test cases. 那边给出测试就好了:
也有快捷键,我们先加入一个 {}:
>go:file struct
生成:
package main

import (
	"testing"
)

func Test_main(t *testing.T) {
	tests := []struct {
		name string
	}{
		// TODO: Add test cases.
		{
			name: "test",
		},
	}
	for _, tt := range tests {
		t.Run(tt.name, func(t *testing.T) {
			main()
		})
	}
}

func Test_swap(t *testing.T) {
	type args struct {
		x *string
		y *string
	}
	tests := []struct {
		name  string
		args  args
		want  string
		want1 string
	}{
		// TODO: Add test cases.
		{
		name: "afsdfwe",
		args: args{
			x: 12,
			y: 214,
		},
		want:  "shabi",
		want1: "wangshan ",
	},
	{
		name: "23asdfs",
		args: args{
			x: 1254,
			y: 421,
		},
		want:  "afswedwe",
		want1: "3erasfdsa",
	},
	}
	for _, tt := range tests {
		t.Run(tt.name, func(t *testing.T) {
			got, got1 := swap(tt.args.x, tt.args.y)
			if got != tt.want {
				t.Errorf("swap() got = %v, want %v", got, tt.want)
			}
			if got1 != tt.want1 {
				t.Errorf("swap() got1 = %v, want %v", got1, tt.want1)
			}
		})
	}
}
测试
就像我们上面的测试用例那样,我们回到测试用例,可以直接设计断点调试
选择类型(测试类型):
"mode": "test"
可以是 远程的
remote,或者选择debug
测试的档案所在目录:
"program": "${file}"
注意
{
    "name": "Launch test function",
    "type": "go",
    "request": "launch",
    "mode": "test",
    "program": "${workspaceFolder}",
    "args": [
        "-test.run",
        "MyTestFunction"
    ]
}
完整性的测试
我们需要设置 program 在某个具体目录下的,比如说:
{
    "configurations": [
        {
            "name": "Launch Package",
            "type": "go",
            "request": "launch",
            "mode": "auto",
            "program": "${fileDirname}/../main"
        },
        {
            "name": "Connect to server",
            "type": "go",
            "request": "attach",
            "mode": "remote",
            "remotePath": "${workspaceFolder}",
            "port": 22,
            "host": "192.168.71.130"
        }
    ]
}
指定函数(function)测试:
// Swap functions
func swap(x, y *string) (string, string) {
	//XOR exchange
	*x, *y = *y, *x
	return *x, *y
}
需要指定 test 参数,来指定具体的测试函数:
{
    "name": "Launch test function",
    "type": "go",
    "request": "launch",
    "mode": "test",
    "program": "${workspaceFolder}",
    "args": [
        "-test.run",
        "MyTestFunction"
    ]
},
vscode 远程调试
提示
When applied to remote-attach configurations, will look for "dlv ... --headless --listen=:" server started externally. In dlv-dap mode, this will apply to all other configurations as well. The extension will try to connect to an external server started with "dlv dap --listen=:" to ask it to launch/attach to the target process.
首先我们需要先启动一个 devle server
dlv --headless debug Test
我们可以在另外一台终端或者机器上模拟这个调用:
root@cubmaster01:~/go/src/k8s.io/kubernetes# dlv connect localhost:40609
Type 'help' for list of commands.
(dlv) break main.go:32
Breakpoint 1 set at 0x4a05b2 for main.main() /workspces/test/main.go:32
(dlv) continue
> main.main() /workspces/test/main.go:32 (hits goroutine(1):1 total:1) (PC: 0x4a05b2)
    27:         gid, _ := strconv.ParseInt(idField, 10, 64)
    28:         return gid
    29: }
    30:
    31: func main() {
=>  32:         debug()
    33: }
创建 .vscode 文件夹(mod rootfs目录),并在下面创建:
创建
settings.json创建
launch.json写入{ //Use IntelliSense to learn about related properties. //Hover to see a description of an existing property. //For more information, please visit: https://go.microsoft.com/fwlink/?linkid=830387 "version": "0.2.0", "configurations": [ { "name": "Connect to server", "type": "go", "request": "attach", "mode": "remote", "remotePath": "/workspace/sealer", "port": 22, "host": "192.168.71.130" }, { "name": "Launch file", "type": "go", "request": "launch", "mode": "debug", "program": "${file}" } ] }
注意
方便起见可以直接在调试窗口一键创建
dlv + VSCode + Go开发环境搭建
需要的问题
项目需要 gcc/c++ 环境,或者是大型的项目需要构建(sealos、sealer、kubernets、prometheus )
**我需要: ** 使用vscode编辑器编写go,然后进行编译、调试(打断点)。
dlv 是一个简称, 实际上,delve 才是全称,dlv 只是启动命令,如果使用 VScode,默认使用的调试器就是基于 delve 的。
常用指令
| 指令 | 用处 | 实操 |
|---|---|---|
| attach | 这个命令将使Delve控制一个已经运行的进程,并开始一个新的调试会话。 当退出调试会话时,你可以选择让该进程继续运行或杀死它。 | case1 |
| exec | 这个命令将使Delve执行二进制文件,并立即附加到它,开始一个新的调试会话。请注意,如果二进制文件在编译时没有关闭优化功能,可能很难正确地调试它。请考虑在Go 1.10或更高版本上用-gcflags="all=-N -l "编译调试二进制文件,在Go的早期版本上用-gcflags="-N -l"。 | case2 |
| help | 使用手册 | case3 |
| debug | 默认情况下,没有参数,Delve将编译当前目录下的 "main "包,并开始调试。或者,你可以指定一个包的名字,Delve将编译该包,并开始一个新的调试会话。 | case4 |
| test | test命令允许你在单元测试的背景下开始一个新的调试会话。默认情况下,Delve将调试当前目录下的测试。另外,你可以指定一个包的名称,Delve将在该包中调试测试。双破折号--可以用来传递参数给测试程序。 | case5 |
| version | 查看dlv版本 | case6 |
goroutine
dlv 特别支持 goroutine
- goroutine
- gorouties
- thread
- threads
dlv调试指令
断点管理
| 指令 | 缩写 | 用法 | 案例 |
|---|---|---|---|
| break | b | 设置断点 | case7 |
| breakpoints | bp | 查看当前所有断点 | case8 |
| clear | / | 删除断点 | case9 |
| clearall | / | 删除多个断点 | case10 |
| toggle | / | 启用或关闭断点 | case11 |
程序执行中的调试指令
| 指令 | 缩写 | 用法 | 案例 |
|---|---|---|---|
| continue | c | 继续执行到一个断点或者程序结束吗 | case12 |
| next | n | 执行下一行代码 | case13 |
| restart | r | 重新执行程序 | case14 |
| step | s | 执行代码的下一步 | case15 |
| step-instruction | si | 执行下一行机器码 | case16 |
| stepout | so | 跳出当前执行函数 | case17 |
参数管理
| 指令 | 缩写 | 用法 | 案例 |
|---|---|---|---|
| args | / | 打印函数input | case18 |
| display | / | 打印加入到display的变量的值,每次执行下一行代码或下一个断点时 | case19 |
| locals | / | 打印局部变量 | case20 |
| p | 打印表达式的结果 | case21 | |
| set | / | 设置某个变量的值 | case22 |
| vars | / | 查看全局变量 | case23 |
| whatis | / | 查看变量类型 | case24 |
其他
| 指令 | 缩写 | 用法 | 案例 |
|---|---|---|---|
| disassemble | disass | 查看反编译后的代码,机器码 | case25 |
| exit | quit / q | 退出 | case26 |
| funcs | / | 打印程序用到的所有函数 | case27 |
| help | h | 帮助信息 | case28 |
| list | ls / l | 打印代码 | case29 |
一个合适的流程开启我们的调试之旅:
- 建立相应的目录。到
/usr/local/go/bin/github.com/路径下建立这样的路径,建立之后应该存在这样的路径/usr/local/go/bin/github.com/derekparker/delve。 - 下载调试依赖的git库:
https://github.com/derekparker/delve需直接zip包,然后把源代码解压,然后把源代码直接放到上面的路径下(上面的路径下应该直接是源代码,可以找到Makefile文件!!!!!!)。 - 执行命令
make install。 - 配置VSCode的launch.json文,具体怎么配置给个官网链接,英文的自己去看,看不懂你根本不配看这个文章。
https://github.com/Microsoft/vscode-go/wiki/Debugging-Go-code-using-VS-Code。 - 打断点进行测试(测试的项目可以是我们一开始编写的hello.go文件)。
安装 dlv
git clone https://github.com/go-delve/delve.git $GOPATH/src/github.com/go-delve/delve
cd $GOPATH/src/github.com/go-delve/delve
make install
export PATH=$PATH:$GOPATH/bin

dlv version
或者使用 get:
go get github.com/derekparker/delve/cmd/dlv
添加debug方案
另外,需要给 Visual Code 添加对应的 debug 方案(debug configuration)。在Visual Code的菜单栏上,通过Debug->Open Configurations打开launch.json的编辑界面。在configurations数组中,加入以下内容后,保存文件。
{
    "name": "Launch remote",
    "type": "go",
    "request": "launch",
    "mode": "remote",
    "remotePath": "/root/go/src/hello",
    "port": 2345,
    "host": "192.168.33.123",
    "program": "${fileDirname}",
    "env": {}
}
执行方法
**dlv的debug远程调试需要远端和近端都持有全部的源代码文件。**为了方便,这里就不改变GOPATH,在远端直接将整个项目,扔到 $GOPATH/src 里面。
源代码文件路径为 $GOPATH/src/hello/main.go
在近端,直接创建 hello目录,就把源代码文件直接放在里面。
dlv debug --headless --listen ":2345" --log --api-version 2
画面显示以下内容则说明dlv服务端已经就绪。
API server listening at: [::]:2345
INFO[0004] launching process with args: [/root/go/src/hello/debug]  layer=debugger
然后,回到 Visual Code 进入 debug 界面,选择 “Launch remote” 方案后,点击启动来进行 go debugger,就能启动远程调试。大部分的操作和本地调试无异,堆栈、变量、watch都能正常使用。
dlv 💡简单的一个案例
PS D:\文档\my\test> dlv exec .\main.exe
Type 'help' for list of commands.
(dlv) b
Breakpoint 1 set at 0x7ffc6a490651 for :0
(dlv) b main.main
Breakpoint 2 set at 0xe7e48f for main.main() d:/文档/my/test/main.go:14
(dlv) c
Stopped at: 0x7ffc6a490651
=>   1: no source available
(dlv) b main.swap
Breakpoint 3 set at 0xe7e51c for main.main() d:/文档/my/test/main.go:10
(dlv) c
> main.main() d:/文档/my/test/main.go:14 (hits goroutine(1):1 total:1) (PC: 0xe7e48f)
Warning: debugging optimized function
     9:         //XOR exchange
    10:         *x, *y = *y, *x
    11:         return *x, *y
    12: }
    13:
=>  14: func main() {
    15:         fmt.Println("Hello, world!")
    16:         //Swap functions
    17:         for i := 0; i < 10; i++ {
    18:                 a := "a"
    19:                 b := "b"
(dlv) bp
Breakpoint runtime-fatal-throw (enabled) at 0xe24a20,0xe24b20 for (multiple functions)() d:/app/go/src/runtime/panic.go:1059 (0)
Breakpoint unrecovered-panic (enabled) at 0xe24ec0 for runtime.fatalpanic() d:/app/go/src/runtime/panic.go:1143 (0)
        print runtime.curg._panic.arg
Breakpoint 1 (enabled) at 0x7ffc6a490651 for :0 (1)
Breakpoint 2 (enabled) at 0xe7e48f for main.main() d:/文档/my/test/main.go:14 (1)
Breakpoint 3 (enabled) at 0xe7e51c for main.main() d:/文档/my/test/main.go:10 (0)
(dlv) clear 2
Breakpoint 2 cleared at 0xe7e48f for main.main() d:/文档/my/test/main.go:14
(dlv) bp
Breakpoint runtime-fatal-throw (enabled) at 0xe24a20,0xe24b20 for (multiple functions)() d:/app/go/src/runtime/panic.go:1059 (0)
Breakpoint unrecovered-panic (enabled) at 0xe24ec0 for runtime.fatalpanic() d:/app/go/src/runtime/panic.go:1143 (0)
        print runtime.curg._panic.arg
Breakpoint 1 (enabled) at 0x7ffc6a490651 for :0 (1)
Breakpoint 3 (enabled) at 0xe7e51c for main.main() d:/文档/my/test/main.go:10 (0)
(dlv) ls
> main.main() d:/文档/my/test/main.go:14 (PC: 0xe7e48f)
Warning: debugging optimized function
     9:         //XOR exchange
    10:         *x, *y = *y, *x
    11:         return *x, *y
    12: }
    13:
=>  14: func main() {
    15:         fmt.Println("Hello, world!")
    16:         //Swap functions
    17:         for i := 0; i < 10; i++ {
    18:                 a := "a"
    19:                 b := "b"
(dlv)
带参数启动程序(
dlv exec ./GoDbg -- arg1 arg2)[lday@alex GoDbg]$ dlv exec ./GoDbg -- arg1 arg2 Type 'help' for list of commands. (dlv)在main函数上设置断点(
b)(dlv) b main.main Breakpoint 1 set at 0x40101b for main.main() ./main.go:9启动调试,断点后继续执行(
c)(dlv) c > main.main() ./main.go:9 (hits goroutine(1):1 total:1) (PC: 0x40101b) 4: "GoWorks/GoDbg/mylib" 5: "fmt" 6: "os" 7: ) 8: => 9: func main() { 10: fmt.Println("Golang dbg test...") 11: 12: var argc = len(os.Args) 13: var argv = append([]string{}, os.Args...) 14:在文件dbgTest.go上通过行号设置断点(
b)(dlv) b dbgTest.go:17 Breakpoint 2 set at 0x457f51 for GoWorks/GoDbg/mylib.DBGTestRun() ./mylib/dbgTest.go:17 (dlv) b dbgTest.go:23 Breakpoint 3 set at 0x4580d0 for GoWorks/GoDbg/mylib.DBGTestRun() ./mylib/dbgTest.go:23 (dlv) b dbgTest.go:26 Breakpoint 4 set at 0x458123 for GoWorks/GoDbg/mylib.DBGTestRun() ./mylib/dbgTest.go:26 (dlv) b dbgTest.go:29 Breakpoint 5 set at 0x458166 for GoWorks/GoDbg/mylib.DBGTestRun() ./mylib/dbgTest.go:29显示所有断点列表(
bp)(dlv) bp Breakpoint unrecovered-panic at 0x429690 for runtime.startpanic() /home/lday/Tools/Dev_Tools/Go_Tools/go_1_6_2/src/runtime/panic.go:524 (0) Breakpoint 1 at 0x40101b for main.main() ./main.go:9 (1) Breakpoint 2 at 0x457f51 for GoWorks/GoDbg/mylib.DBGTestRun() ./mylib/dbgTest.go:17 (0) Breakpoint 3 at 0x4580d0 for GoWorks/GoDbg/mylib.DBGTestRun() ./mylib/dbgTest.go:23 (0) Breakpoint 4 at 0x458123 for GoWorks/GoDbg/mylib.DBGTestRun() ./mylib/dbgTest.go:26 (0) Breakpoint 5 at 0x458166 for GoWorks/GoDbg/mylib.DBGTestRun() ./mylib/dbgTest.go:29 (0)dlv似乎没有提供类似gdb
dis x,禁止某个断点的功能,在文档中暂时没有查到。不过这个功能用处不大。删除某个断点(
clear x)(dlv) clear 5 Breakpoint 5 cleared at 0x458166 for GoWorks/GoDbg/mylib.DBGTestRun() ./mylib/dbgTest.go:29 (dlv) bp Breakpoint unrecovered-panic at 0x429690 for runtime.startpanic() /home/lday/Tools/Dev_Tools/Go_Tools/go_1_6_2/src/runtime/panic.go:524 (0) Breakpoint 1 at 0x40101b for main.main() ./main.go:9 (1) Breakpoint 2 at 0x457f51 for GoWorks/GoDbg/mylib.DBGTestRun() ./mylib/dbgTest.go:17 (0) Breakpoint 3 at 0x4580d0 for GoWorks/GoDbg/mylib.DBGTestRun() ./mylib/dbgTest.go:23 (0) Breakpoint 4 at 0x458123 for GoWorks/GoDbg/mylib.DBGTestRun() ./mylib/dbgTest.go:26 (0)显示当前运行的代码位置(
ls)(dlv) ls > GoWorks/GoDbg/mylib.DBGTestRun() ./mylib/dbgTest.go:17 (hits goroutine(1):1 total:1) (PC: 0x457f51) 12: C map[int]string 13: D []string 14: } 15: 16: func DBGTestRun(var1 int, var2 string, var3 []int, var4 MyStruct) { => 17: fmt.Println("DBGTestRun Begin!\n") 18: waiter := &sync.WaitGroup{} 19: 20: waiter.Add(1) 21: go RunFunc1(var1, waiter) 22:查看当前调用栈信息(
bt)(dlv) bt 0 0x0000000000457f51 in GoWorks/GoDbg/mylib.DBGTestRun at ./mylib/dbgTest.go:17 1 0x0000000000401818 in main.main at ./main.go:27 2 0x000000000042aefb in runtime.main at /home/lday/Tools/Dev_Tools/Go_Tools/go_1_6_2/src/runtime/proc.go:188 3 0x0000000000456df0 in runtime.goexit at /home/lday/Tools/Dev_Tools/Go_Tools/go_1_6_2/src/runtime/asm_amd64.s:1998输出变量信息(
print/p)(dlv) print var1 1 (dlv) print var2 "golang dbg test" (dlv) print var3 []int len: 3, cap: 3, [1,2,3] (dlv) print var4 GoWorks/GoDbg/mylib.MyStruct { A: 1, B: "golang dbg my struct field B", C: map[int]string [ 1: "value1", 2: "value2", 3: "value3", ], D: []string len: 3, cap: 3, ["D1","D2","D3"],}*类比gdb调试,我们看到,之前我们使用gdb进行调试时,发现gdb在此时无法输出var3, var4的内容,而dlv可以*
在第n层调用栈上执行相应指令(
frame n cmd)(dlv) frame 1 ls 22: var4.A = 1 23: var4.B = "golang dbg my struct field B" 24: var4.C = map[int]string{1: "value1", 2: "value2", 3: "value3"} 25: var4.D = []string{"D1", "D2", "D3"} 26: => 27: mylib.DBGTestRun(var1, var2, var3, var4) 28: fmt.Println("Golang dbg test over") 29: }frame 1 ls将显示程序在第1层调用栈上的具体实行位置查看goroutine的信息(
goroutines) 当我们执行到dbgTest.go:26时,我们已经启动了两个goroutine(dlv) > GoWorks/GoDbg/mylib.DBGTestRun() ./mylib/dbgTest.go:26 (hits goroutine(1):1 total:1) (PC: 0x458123) 21: go RunFunc1(var1, waiter) 22: 23: waiter.Add(1) 24: go RunFunc2(var2, waiter) 25: => 26: waiter.Add(1) 27: go RunFunc3(&var3, waiter) 28: 29: waiter.Add(1) 30: go RunFunc4(&var4, waiter) 31:此时我们来查看程序的goroutine状态信息
(dlv) goroutines
[6 goroutines]
* Goroutine 1 - User: ./mylib/dbgTest.go:26 GoWorks/GoDbg/mylib.DBGTestRun (0x458123) (thread 9022)
  Goroutine 2 - User: /home/lday/Tools/Dev_Tools/Go_Tools/go_1_6_2/src/runtime/proc.go:263 runtime.gopark (0x42b2d3)
  Goroutine 3 - User: /home/lday/Tools/Dev_Tools/Go_Tools/go_1_6_2/src/runtime/proc.go:263 runtime.gopark (0x42b2d3)
  Goroutine 4 - User: /home/lday/Tools/Dev_Tools/Go_Tools/go_1_6_2/src/runtime/proc.go:263 runtime.gopark (0x42b2d3)
  Goroutine 5 - User: ./mylib/dbgTest.go:39 GoWorks/GoDbg/mylib.RunFunc1 (0x4583eb) (thread 9035)
  Goroutine 6 - User: /home/lday/Tools/Dev_Tools/Go_Tools/go_1_6_2/src/fmt/format.go:130 fmt.(*fmt).padString (0x459545)
从输出的信息来看,先启动的goroutine 5,执行
RunFunc1,此时还没有执行fmt.Printf,而后启动的goroutine 6,执行RunFunc2,则已经进入到fmt.Printf的内部调用过程中了进一步查看goroutine信息(
goroutine x) 接第11步的操作,此时我想查看goroutine 6的具体执行情况,则执行goroutine 6(dlv) goroutine 6 Switched from 1 to 6 (thread 9022)在此基础上,执行
bt,则可以看到当前goroutine的调用栈情况(dlv) bt 0 0x0000000000454730 in runtime.systemstack_switch at /home/lday/Tools/Dev_Tools/Go_Tools/go_1_6_2/src/runtime/asm_amd64.s:245 1 0x000000000040f700 in runtime.mallocgc at /home/lday/Tools/Dev_Tools/Go_Tools/go_1_6_2/src/runtime/malloc.go:643 2 0x000000000040fc43 in runtime.rawmem at /home/lday/Tools/Dev_Tools/Go_Tools/go_1_6_2/src/runtime/malloc.go:809 3 0x000000000043c2a5 in runtime.growslice at /home/lday/Tools/Dev_Tools/Go_Tools/go_1_6_2/src/runtime/slice.go:95 4 0x000000000043c015 in runtime.growslice_n at /home/lday/Tools/Dev_Tools/Go_Tools/go_1_6_2/src/runtime/slice.go:44 5 0x0000000000459545 in fmt.(*fmt).padString at /home/lday/Tools/Dev_Tools/Go_Tools/go_1_6_2/src/fmt/format.go:130 6 0x000000000045a13f in fmt.(*fmt).fmt_s at /home/lday/Tools/Dev_Tools/Go_Tools/go_1_6_2/src/fmt/format.go:322 7 0x000000000045e905 in fmt.(*pp).fmtString at /home/lday/Tools/Dev_Tools/Go_Tools/go_1_6_2/src/fmt/print.go:518 8 0x000000000046200f in fmt.(*pp).printArg at /home/lday/Tools/Dev_Tools/Go_Tools/go_1_6_2/src/fmt/print.go:797 9 0x0000000000468a8d in fmt.(*pp).doPrintf at /home/lday/Tools/Dev_Tools/Go_Tools/go_1_6_2/src/fmt/print.go:1238 10 0x000000000045c654 in fmt.Fprintf at /home/lday/Tools/Dev_Tools/Go_Tools/go_1_6_2/src/fmt/print.go:188此时输出了10层调用栈,但似乎最原始的我自身程序dbgTest.go的调用栈没有输出, 可以通过
bt加depth参数,设定bt的输出深度,进而找到我们自己的调用栈,例如bt 13(dlv) bt 13 ... 10 0x000000000045c654 in fmt.Fprintf at /home/lday/Tools/Dev_Tools/Go_Tools/go_1_6_2/src/fmt/print.go:188 11 0x000000000045c74b in fmt.Printf at /home/lday/Tools/Dev_Tools/Go_Tools/go_1_6_2/src/fmt/print.go:197 12 0x000000000045846f in GoWorks/GoDbg/mylib.RunFunc2 at ./mylib/dbgTest.go:50 13 0x0000000000456df0 in runtime.goexit at /home/lday/Tools/Dev_Tools/Go_Tools/go_1_6_2/src/runtime/asm_amd64.s:1998我们看到,我们自己dbgTest.go的调用栈在第12层。当前goroutine已经不再我们自己的调用栈上,而是进入到系统函数的调用中,在这种情况下,使用gdb进行调试时,我们发现,此时我们没有很好的方法能够输出我们需要的调用栈变量信息。**dlv可以!**此时只需简单的通过
frame x cmd就可以输出我们想要的调用栈信息了(dlv) frame 12 ls 45: time.Sleep(10 * time.Second) 46: waiter.Done() 47: } 48: 49: func RunFunc2(variable string, waiter *sync.WaitGroup) { => 50: fmt.Printf("var2:%v\n", variable) 51: time.Sleep(10 * time.Second) 52: waiter.Done() 53: } 54: 55: func RunFunc3(pVariable *[]int, waiter *sync.WaitGroup) { (dlv) frame 12 print variable "golang dbg test" (dlv) frame 12 print waiter *sync.WaitGroup { state1: [12]uint8 [0,0,0,0,2,0,0,0,0,0,0,0], sema: 0,}多好的功能啊!
查看当前是在哪个goroutine上(
goroutine) 当使用goroutine不带参数时,dlv就会显示当前goroutine信息,这可以帮助我们在调试时确认是否需要做goroutine切换(dlv) goroutine Thread 9022 at ./mylib/dbgTest.go:26 Goroutine 6: Runtime: /home/lday/Tools/Dev_Tools/Go_Tools/go_1_6_2/src/runtime/asm_amd64.s:245 runtime.systemstack_switch (0x454730) User: /home/lday/Tools/Dev_Tools/Go_Tools/go_1_6_2/src/fmt/format.go:130 fmt.(*fmt).padString (0x459545) Go: ./mylib/dbgTest.go:26 GoWorks/GoDbg/mylib.DBGTestRun (0x458123)
dlv前端(gdlv)
dlv提供了类似gdb的cli调试系统,而有第三方还提供了dlv的GUI前端(gdlv),对于那些习惯了使用GUI进行调试的人来说,结合gdlv和dlv,调试会更加方便。gdlv有个问题是:他无法在xwindows server上运行,只能在server本地运行。 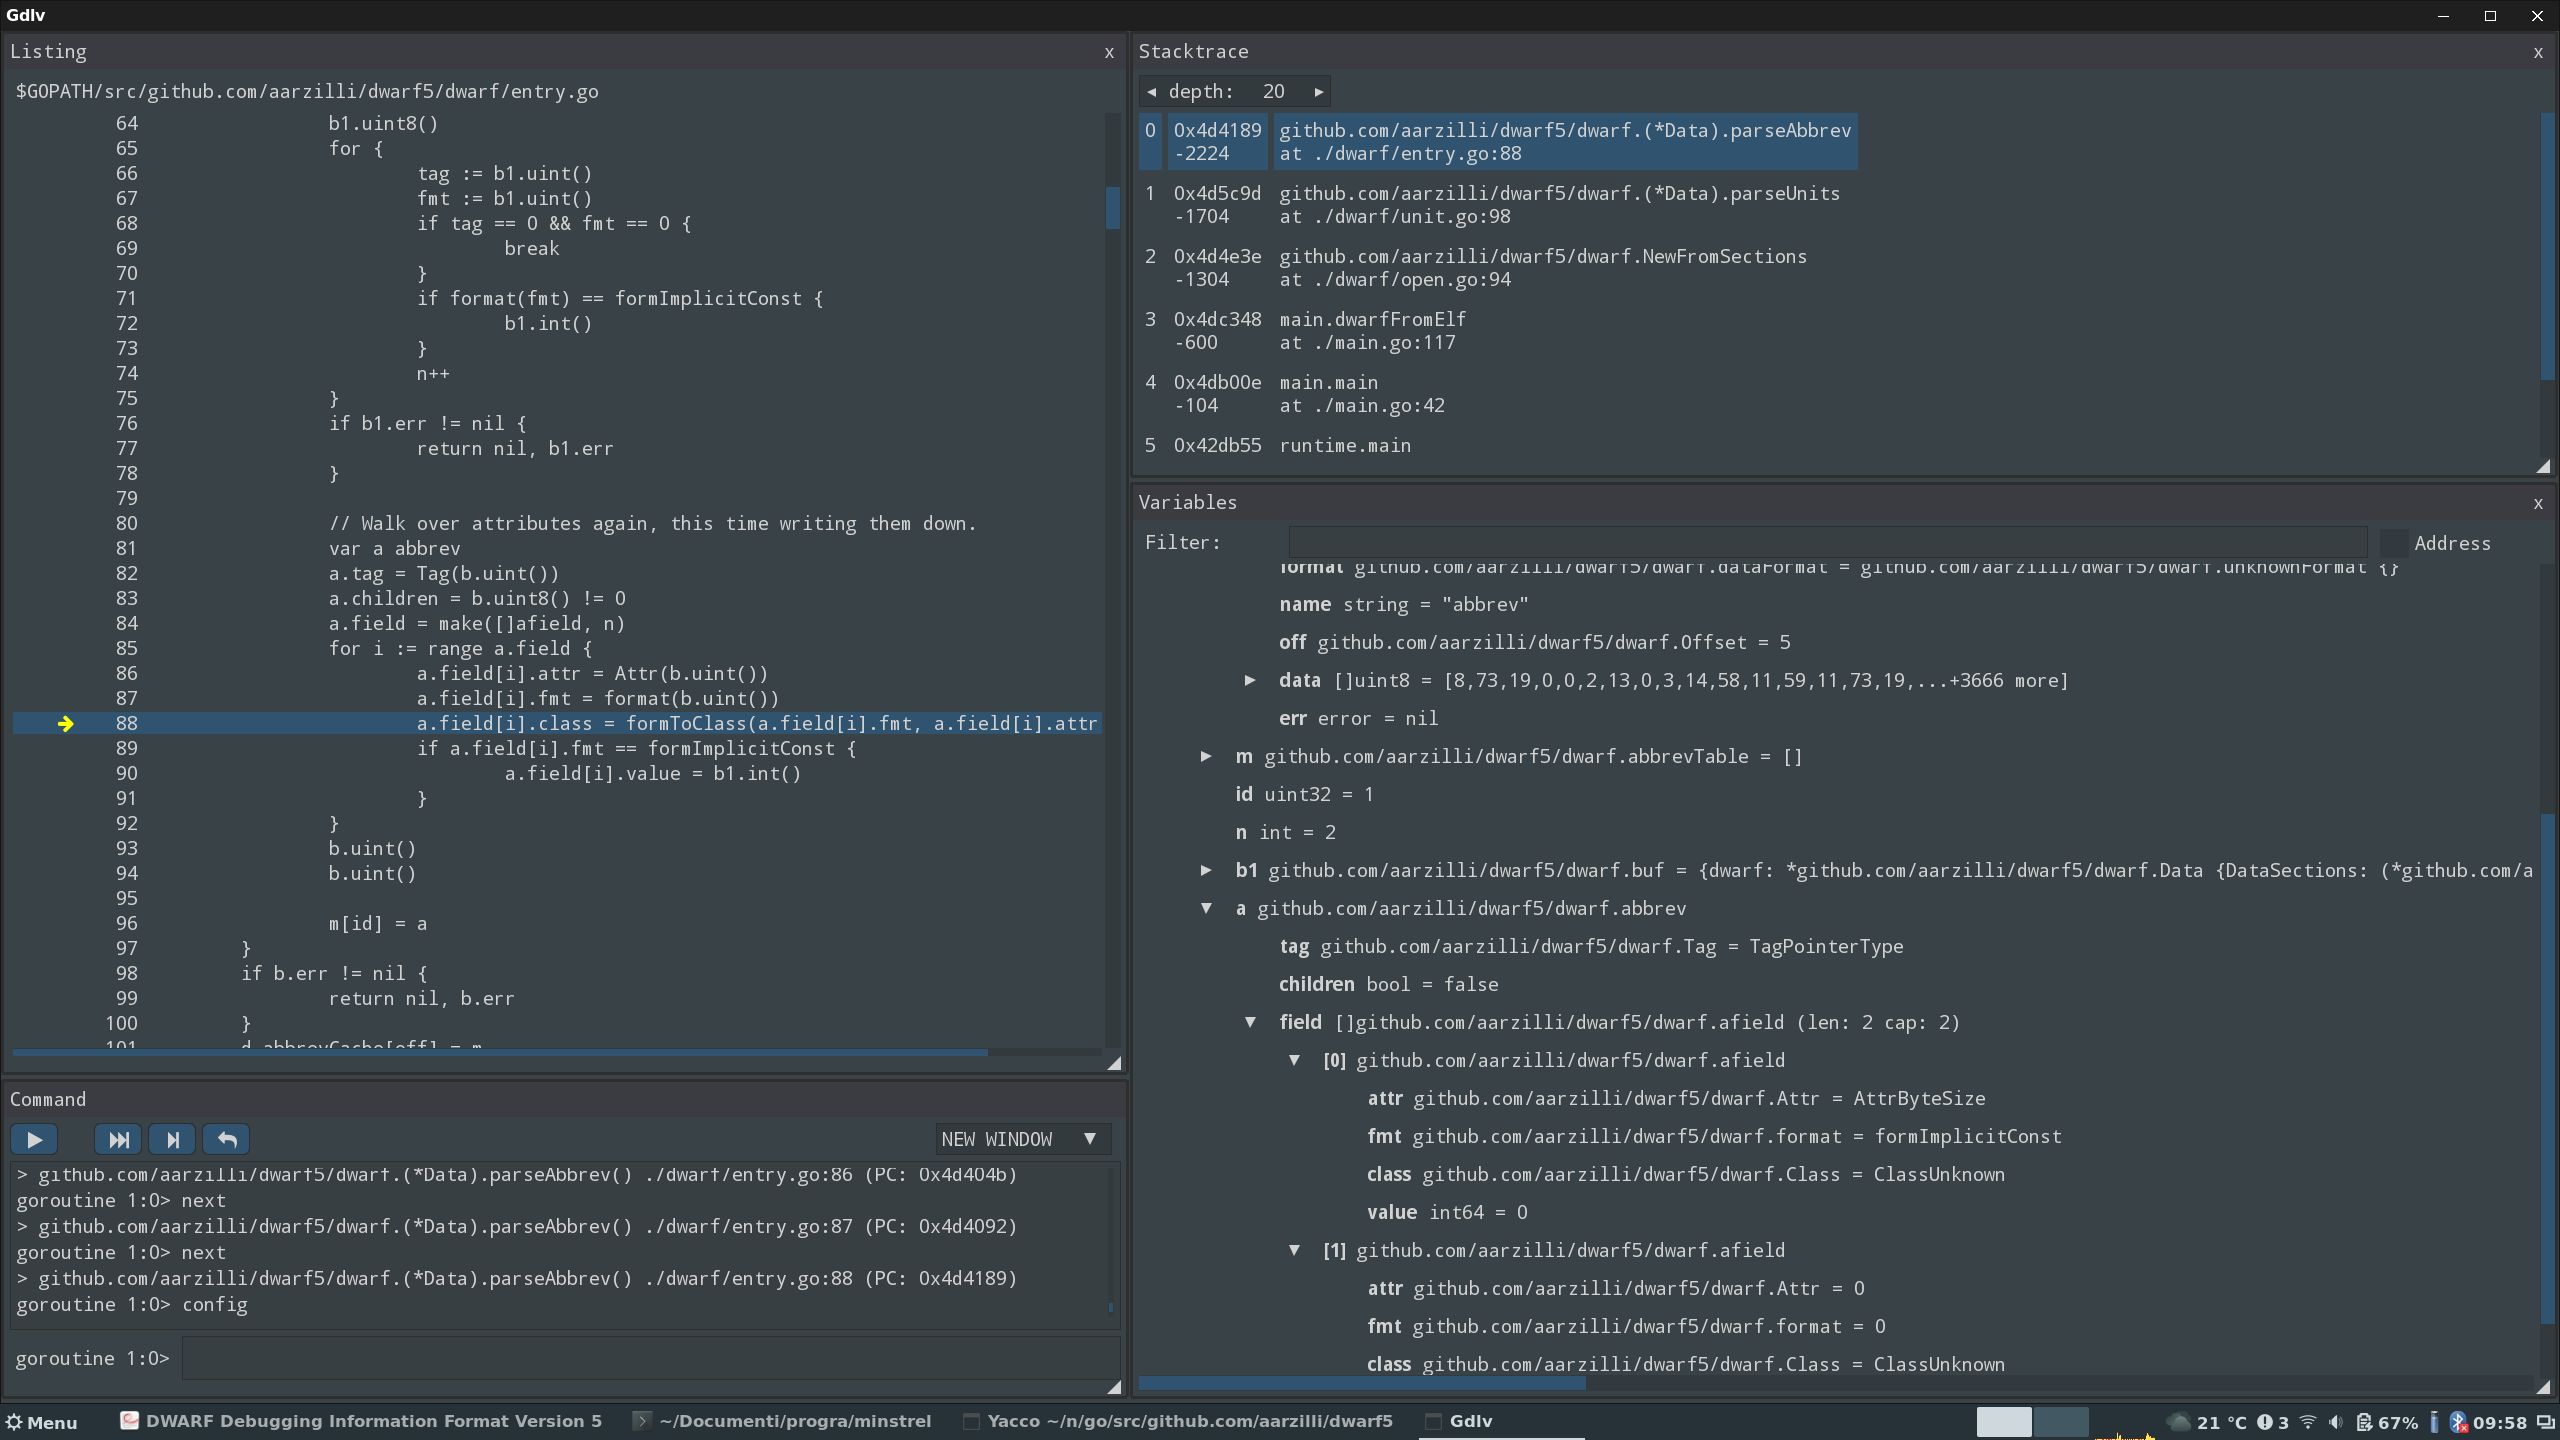
结论
综合比较两个Golang程序调试器gdb和dlv,我认为dlv的功能更为完善,更能满足实际调试时的功能需求。两者的优缺点比较大致如下
| 调试器 | 优势 | 不足 |
|---|---|---|
| dlv | 对goroutine, go类型调试支持比较完善 | 只支持 go, 不支持调试某些Go内部底部数据 |
| gdb | 符合现有的调试习惯,类似C/C++调试指令都有 | 对goroutine场景支持不足,不能很好的应对goroutine的调试 |
总结
通过 Visual Code+dlv 来进行 go 程序的远程调试,对“开发用Windows,生产用Linux”之类的场合下,调试与系统相关的问题非常有帮助。而且,Visual Code的图形界面和代码提示实在是相当方便。
但是debug这个做法有两点不完善的地方。第一个是它原理上需要远端对源代码进行编译,局限了它在除了开发测试环境外的使用场景,也使得每次调试都得等它编译;另一个是因为远端和近端都得有相同的源代码,无论是dlv还是 Visual Code的Go插件,目前都没法自动将本地改动过的代码上传到远端去。
END 链接
✴️版权声明 © :本书所有内容遵循CC-BY-SA 3.0协议(署名-相同方式共享)©